A well-developed project brief sets the foundation for a successful kitchen or bath project and creates a clear record of design intent from start to finish. For kitchen and bath professionals, a project brief can guide decisions during the design process and serve as a reflection tool once the project is complete.
Whether you’re planning a new project, reviewing work internally, or preparing a professional portfolio, a strong project brief helps articulate the thinking behind the design.
Here’s how to create a strong project brief:
Step 1 to Create a Project Brief: Create a Customer Overview (Define the Audience)
Every strong project begins with a clear understanding of the client. The customer overview defines who the space is for and how it needs to function in everyday life.
Consider:
- Who lives in the home and how they use the kitchen or bath
- Cooking, entertaining, or lifestyle habits
- Storage needs, accessibility considerations, or long-term plans
- Design preferences and overall expectations
Create a summary of the information you collect during your client consultation and keep it handy to reference as the project moves forward.
Step 2 to Create a Project Brief: Know Your Objectives
Project objectives clarify what success looks like. This is a must-have guide to your design decisions and helps prioritize what matters most.
Objectives may include:
- Improving layout efficiency or workflow
- Increasing storage and organization
- Updating the look while maintaining warmth and function
- Creating a space that supports daily life and special occasions
Clear objectives help designers evaluate choices throughout the project and reflect on outcomes afterward.
Step 3 to Create a Project Brief: Review Key Requirements (The Project Must-Haves)
This section outlines the essential elements that define the project. These are the non-negotiables that must be met for the design to succeed.
Key requirements may cover:
- Features: pantry solutions, integrated appliances, island seating, custom storage
- Style: modern, transitional, traditional, or layered contemporary
- Layout: existing footprint, reconfiguration, circulation, and clearances
- Cabinet materials: wood species, painted finishes, or mixed-material approaches
Documenting these requirements early helps maintain alignment from concept through installation.
Step 4 to Create a Project Brief: Develop a Design Statement
The design statement brings the project brief together. It communicates intent, problem-solving, and creative thinking in a clear, concise way.
Your design statement can be:
- A short written narrative
- A structured bulleted list
- Or a combination of both
Keep it under 1250 characters.
A strong design statement should:
- Introduce the client and their needs
- Outline the project objectives and design challenges
- Explain how the design addresses those needs
- Highlight creative solutions, styling choices, or innovative product usage
- Call out design elements that feel unique or memorable
- Reflect what you enjoyed about the project or how it helped you grow as a designer
This is especially valuable for professional portfolios, submissions, and internal reviews.
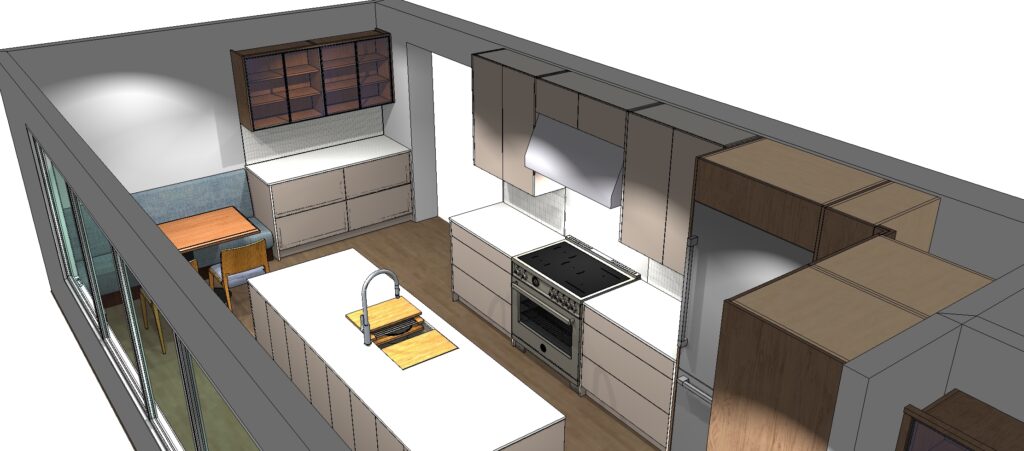
Step 5 to Create a Project Brief: Include Photos, Renders, and Project Notes
Visual and supporting materials strengthen the project brief and provide context for the design decisions.
Include:
- Finished photography or in-progress images
- Renders or drawings that explain layout and detailing
- Notes on constraints, revisions, or custom solutions
These materials help others fully understand the scope and execution of the project.
Step 6 to Create a Project Brief: Measuring Project Success
A project brief can also serve as a reflection tool after project completion. Reviewing the project through the lens of the original brief helps assess its success.
Ask:
- Did the final design meet the original objectives?
- Does the space function as intended for the client?
- Were challenges resolved effectively?
- Did the project align with the client’s expectations and budget?
This step supports growth, consistency, and confidence in future projects.
Tip for Award Submissions and Professional Portfolios
When preparing a project for awards or your professional portfolio, use your project brief as a reflection tool. Refine it into a clear customer overview, a focused set of objectives, and a concise design statement that explains not just what you designed, but why.
This context helps reviewers quickly understand your intent, problem-solving approach, and the decisions that shaped the final kitchen or bath design.